Introduction
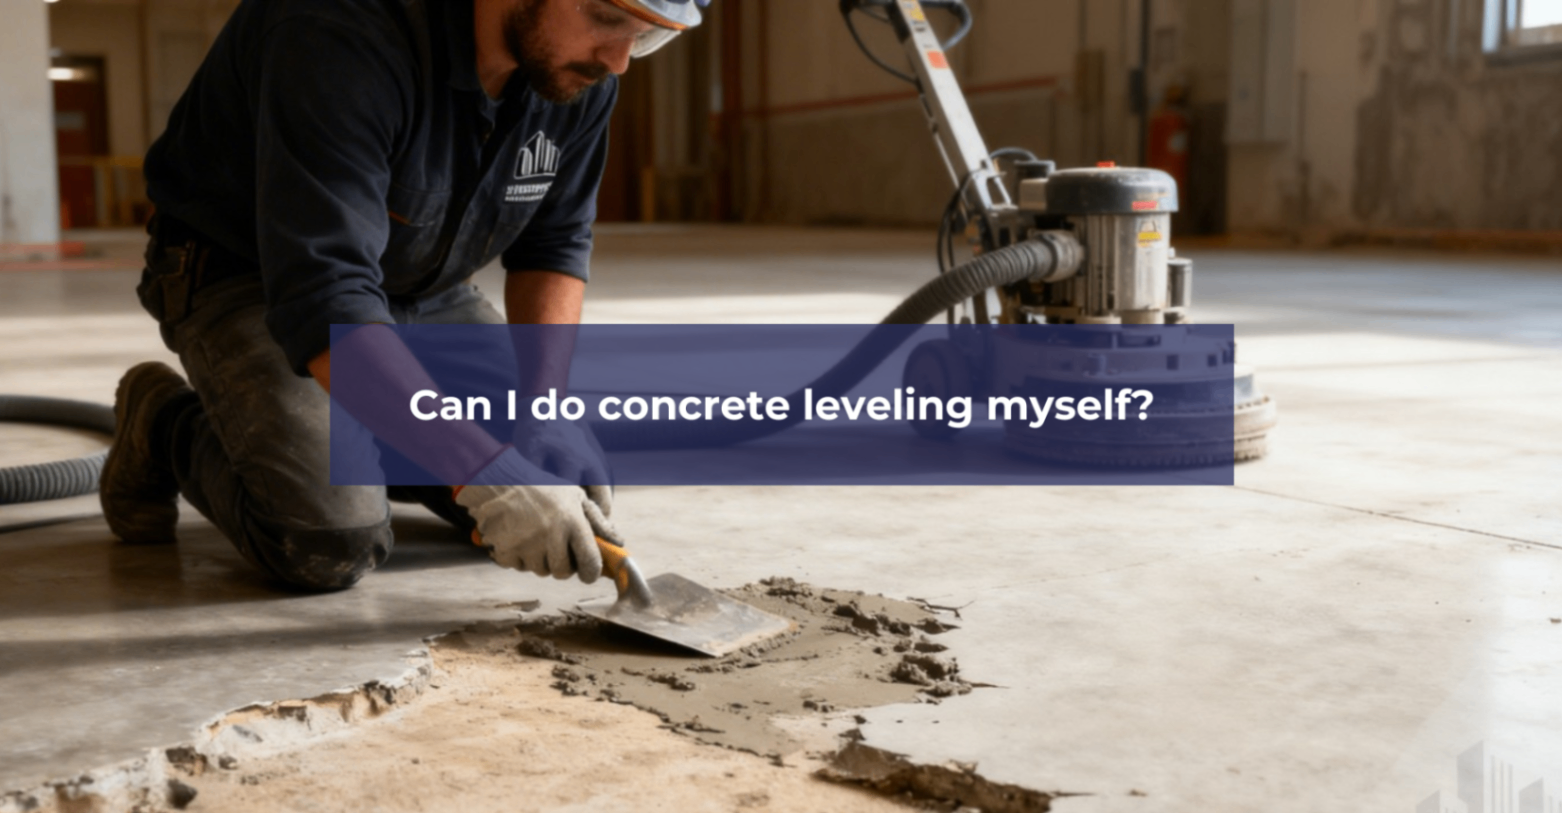
Have you noticed your concrete slab isn’t as smooth as it used to be? Uneven floors can be more than just an eyesore; they can be a safety hazard. You might be wondering if you can tackle concrete leveling on your own. The good news is that with the right tools and guidance, a DIY approach using a self-leveling compound is often possible. This article will guide you through the process, helping you decide if this project is right for you and how to achieve a professional-looking result.
Understanding DIY Concrete Leveling
Before you jump into a DIY concrete leveling project, it’s important to understand what it involves. This type of concrete repair isn’t just about pouring new material; it requires careful preparation of the existing concrete slab and choosing the right products, like a self-leveling compound, to achieve a smooth finish.
Knowing the basics can help you determine if you have the skills and patience for the job. We will explore what concrete leveling is, why it’s necessary, and the common issues that cause uneven surfaces in the first place.
What Is Concrete Leveling and Why Does It Matter?
Concrete leveling is the process of correcting an uneven concrete surface. Over time, a slab can settle or shift, creating frustrating low spots and high areas. The goal of leveling is to create a flat and stable level surface, which is crucial for safety and for installing new flooring like tile or carpet.
Why is this so important? An uneven floor is a tripping hazard and can cause problems with furniture placement and even affect how doors open and close. For any flooring installation to look its best and last a long time, it needs a perfectly flat base.
The basic steps to level concrete at home involve cleaning the surface, priming it, mixing a self-leveling compound, and pouring it over the low spots. The compound flows and settles, creating a new, level surface on your slab.
Common Causes of Uneven Concrete Surfaces in Brisbane
If you have uneven concrete, you might be wondering how it happened. Several factors can lead to this issue, especially in a place like Brisbane. Understanding the root cause is the first step in deciding whether you can fix it yourself.
Many times, the problem lies beneath the slab. For instance, soil that wasn’t properly compacted before the concrete was poured can settle over time, creating voids. This lack of support causes the concrete to sink and become uneven. Yes, you can often fix uneven concrete floors yourself if the issue is minor.
Here are some common culprits:
- Soil Erosion: Water runoff can wash away the soil under the slab, creating voids and causing it to settle unevenly.
- Moisture Fluctuations: Changes in moisture levels can make the soil expand and contract, leading to surface shifts.
- Tree Root Growth: Growing tree roots can push up on a slab from below, causing it to lift and crack.
- Poor Compaction: If the soil base wasn’t packed down tightly initially, it can settle over time, causing the concrete above to become uneven. You might notice this as gaps between the floor and your baseboards.
Risks and Challenges of Uneven Concrete Floors
Living with uneven concrete floors poses more than just an aesthetic problem; it introduces several risks. The most immediate concern is safety. Slanted or bumpy surfaces create significant tripping hazards, which are especially dangerous for children, the elderly, or anyone with mobility issues.
Beyond the immediate safety risk, uneven concrete can cause problems for your home. It can lead to drainage issues, with water pooling in low spots and potentially causing damage to your foundation. Furthermore, it can make installing new flooring nearly impossible, as materials like tile and wood require a flat surface to be installed correctly.
One common mistake to avoid during a DIY repair is failing to prepare the surface properly. You must ensure the area is clean and free of debris. Another tip is to always wear appropriate safety gear, as working with concrete materials can expose you to dust and chemicals.
Deciding If DIY Concrete Leveling Is Right for You
So, you’re considering a DIY concrete repair. For many homeowners, leveling a floor can be a manageable project, especially if the unevenness is minor. With the right preparation and materials, you can achieve a great result and save on costs. This hands-on approach can be very satisfying.
However, it’s crucial to be realistic about the scope of the job. Some situations are better left to the professionals. We’ll help you identify the signs that your concrete needs leveling and understand when it’s time to call for professional help.
Identifying Signs That Your Concrete Needs Leveling
How can you tell if your concrete slab truly needs leveling? Sometimes the signs are obvious, but other times they’re more subtle. Paying attention to these indicators can help you catch problems early before they become bigger issues, especially before laying a new underlayment for flooring.
One of the easiest ways to check is by simple observation. Look for visible cracks, dips, or high spots on your existing concrete floor. If water pools in certain areas after a spill or cleaning, that’s a clear sign of low spots.
You can also watch for these signs:
- Visible cracks or sloping: You can see with your own eyes that the floor isn’t flat.
- Gaps: Noticeable gaps appear between the floor and the walls or baseboards.
- Flooring issues: If you have flooring installed, it might start to buckle, or tiles may crack.
- Doors and windows stick: Doors that swing over the area may jam or not close properly, indicating a shift in the foundation.
When Should You Consider Professional Help?
While DIY concrete repair is possible for minor issues, there are times when calling for professional help is the smarter, safer choice. If you’re dealing with extensive damage, large areas, or signs of structural problems, it’s best to consult an expert. Many companies offer a free estimate, so you can understand the scope and cost without commitment.
Signs that you should get professional help include large, deep cracks, a slab that has sunk more than an inch and a half, or issues caused by serious foundation problems. Professionals have the specialized equipment and experience to handle complex situations like mudjacking or polyurethane foam injection, which are not typical DIY methods.
Consider this to help you decide: | DIY Project | Professional Help | |—————————————————-|—————————————————————–| | Small, shallow low spots or minor imperfections. | Large areas or significant unevenness (over 1.5 inches). | | You have the time and basic handyman skills. | The floor has major structural cracks or foundation issues. | | The issue is contained to a small, manageable area. | You need advanced techniques like mudjacking or foam injection. | | You’re comfortable with physical labor. | You want the job done quickly and with a warranty. |
Tools and Materials Needed for DIY Concrete Leveling
Ready to get started? Gathering the right tools and materials is the first step to a successful DIY project. You won’t just need self-leveling concrete; you’ll also need specific equipment to prepare the surface and apply the compound correctly. Unlike regular cement or mortar, self-leveling products are designed to flow and create a smooth finish.
Having everything on hand before you begin is crucial, as the product sets quickly once mixed. Let’s look at the essential equipment you’ll need, how to choose the right materials, and the safety gear you shouldn’t forget.
Essential Equipment for Home Concrete Leveling
To level your concrete slab correctly, you’ll need more than just the concrete leveler itself. Having the proper equipment will make the job easier and ensure a better result. Start by gathering everything you need before you even think about mixing.
For the preparation stage, a shop vacuum, broom, and mop are essential for cleaning the surface thoroughly. You’ll also need large mixing buckets, a powerful mixing drill with a paddle attachment, and a gauge rake to spread the compound to the correct thickness. Don’t forget personal protective equipment (PPE) to keep you safe.
Here’s a quick list of tools and materials you’ll need for concrete leveling on your own:
- Mixing drill and paddle: For blending the compound smoothly.
- Gauge rake or spreader: To distribute the leveler evenly.
- Level and straightedge: To check for high and low spots.
- Large mixing buckets: You’ll need at least a 6-gallon bucket.
Choosing the Best Self-Leveling Compounds and Materials
Selecting the right self-leveling compound is critical for your project’s success. Not all products are the same; they vary in thickness capabilities, setting times, and suitability for different subfloors. Self-leveling concrete is an excellent option for DIY projects because it’s designed to flow easily and level itself out with minimal effort.
When choosing a concrete leveler, always read the manufacturer’s instructions carefully. These will tell you the maximum thickness the product can be poured and whether you need to use a primer first. The instructions will also specify how much water to add to the mix.
Getting the water-to-mix ratio correct is crucial. Adding too much water can weaken the compound and cause it to fail, while not enough will prevent it from flowing properly. Buy more product than you think you’ll need, as running out mid-pour can ruin the job.
Safety Gear and Precautions for DIY Concrete Leveling
Safety should always be your top priority during any DIY project, and concrete leveling is no exception. Working with wet concrete and other materials poses certain risks, so taking the right precautions and wearing the proper personal protective equipment (PPE) is essential.
Before you start, ensure your workspace is well-ventilated. The dust from mixing concrete compounds can be harmful if inhaled. Also, keep the area clean and organized to prevent slips and falls, especially when dealing with a wet and slippery surface.
Here are some key safety precautions you should take when leveling concrete yourself:
- Wear safety glasses and gloves: Protect your eyes from splashes and your hands from the chemicals in the wet concrete.
- Use a dust mask or respirator: Avoid inhaling harmful dust when mixing the compound.
- Wear steel-toed boots: Protect your feet from spills and heavy equipment.
- Ensure proper ventilation: Open windows and doors to allow dust and fumes to dissipate.
Step-by-Step Guide to Leveling Concrete Yourself
Now that you’ve decided to tackle concrete leveling yourself and have your tools ready, it’s time to walk through the entire process. Following a clear, step-by-step guide will help you avoid common mistakes and ensure your new surface is perfectly flat and ready for flooring.
This guide will break down the project into three main stages: preparing the surface, mixing and applying the compound, and finishing the job. Let’s get started on creating a smooth foundation for your space.
Step 1: Preparing the Concrete Surface for Leveling
Proper preparation is the most critical step for a successful outcome. The new compound needs a clean, sound surface to bond to, so don’t skip this stage. Start by thoroughly cleaning the existing concrete floor. Use a shop vacuum to remove all dirt, dust, and debris. Any oil or grease stains must also be removed completely.
Next, inspect the floor for any cracks or holes. These imperfections should be filled with a suitable concrete repair compound before you apply the leveler. You also need to check for moisture issues. All concrete contains some moisture, but excessive levels can cause the leveling compound to fail. If you suspect a moisture problem, it’s best to address it before proceeding. Sealing any gaps around the perimeter with caulk can also prevent the leveler from leaking.
Priming the surface is also a key part of the preparation. Most manufacturers recommend applying a primer to enhance the bond between the old concrete and the new leveling compound. Follow the product’s instructions for application and drying times.
Step 2: Mixing and Applying Self-Leveling Compound
With your surface prepped and primed, you’re ready for the main event: mixing and applying the self-leveling compound. This step moves quickly, so make sure all your tools are within reach. Start by carefully reading the manufacturer’s instructions on the bag. The mixing ratio is critical, so measure exactly how much water you need.
Using a powerful mixing drill with a paddle attachment, blend the powder and water in a large bucket until you have a smooth, lump-free consistency. Work quickly, as you may only have 10-20 minutes of working time before the compound begins to set.
Pour the mixed compound onto the concrete surface, starting in the farthest corner and working your way toward the exit. Use a gauge rake or trowel to help spread it evenly across the floor. The product is designed to flow and fill in low spots on its own. The thickness you can apply depends on the product, but many self-leveling cements can be poured up to an inch and a half thick.
Step 3: Smoothing, Curing, and Final Checks
Once you’ve poured and spread the compound, the hard part is over. The product will continue to flow and settle, creating a smooth, level surface. While it does most of the smoothing on its own, you can use a trowel to gently guide it into corners and feather the edges.
Now, it’s time to let the compound cure. The drying time varies by product, but many self-leveling compounds are ready for light foot traffic in just a few hours. However, you should wait for the compound to fully cure before installing any flooring. This can take anywhere from 24 hours to a week, depending on the product and thickness.
After the recommended curing time, perform your final checks to ensure a perfect job.
- Check for level: Use a straightedge or level to confirm the surface is flat.
- Inspect for imperfections: Look for any bubbles or high spots that may need to be sanded down.
- Plan for flooring: Once you’re satisfied, your new level surface is ready for the flooring of your choice.
- Calculate your success: Take pride in knowing you successfully leveled several square feet of concrete all on your own.
Conclusion
In summary, tackling concrete leveling yourself can be a rewarding project if approached with the right knowledge and tools. By understanding the reasons behind uneven surfaces and recognizing the signs that indicate your concrete needs attention, you can make informed decisions about whether to proceed on your own or call in a professional. Remember, safety should always come first, so equip yourself with the necessary safety gear and follow the step-by-step guide meticulously. With careful planning and execution, you’ll restore not only the functionality of your surfaces but also enhance the overall aesthetic of your space. If you’re ready to take on the challenge and want professional guidance, feel free to reach out for a consultation!
Frequently Asked Questions
How can I determine if my concrete slab needs leveling?
You can determine if your slab needs leveling by looking for visual signs like cracks, slopes, or water pooling in low spots. Place a long, straight level on the concrete surface to check for gaps. Issues with flooring, like buckled panels or cracked tiles, also indicate an uneven foundation.
Are there any safety precautions I should take when leveling concrete myself?
Yes, safety is crucial. Always wear personal protective equipment (PPE) like safety glasses, gloves, and a dust mask. Ensure the area is well-ventilated to avoid inhaling dust from the concrete repair materials. Be cautious when working with wet concrete, as it can cause skin irritation.