Introduction
Are you dealing with an uneven concrete floor and wondering if there’s an easy fix? Pouring self-leveling concrete over an existing concrete slab is a popular and effective solution. For homeowners and renovators in Brisbane, achieving a perfectly level surface is crucial, especially with modern flooring trends that demand a flawless foundation. This guide will walk you through everything you need to know about this concrete leveling technique, helping you decide if it’s the right choice for your project.
Understanding Self-Leveling Concrete and Its Use in Brisbane
Self-leveling concrete is a cement-based mixture that is gaining significant popularity among Brisbane property owners. It’s a go-to solution for creating a smooth surface over a damaged or uneven concrete slab without the intensive labor of traditional methods.
Its versatility makes it suitable for local conditions, whether you’re renovating a basement or preparing a floor for new coverings. This new layer of concrete provides a perfectly flat base, ready for whatever finish you have in mind. Let’s explore what this material is and how it can benefit your space.
What Is Self-Leveling Concrete and How Does It Work?
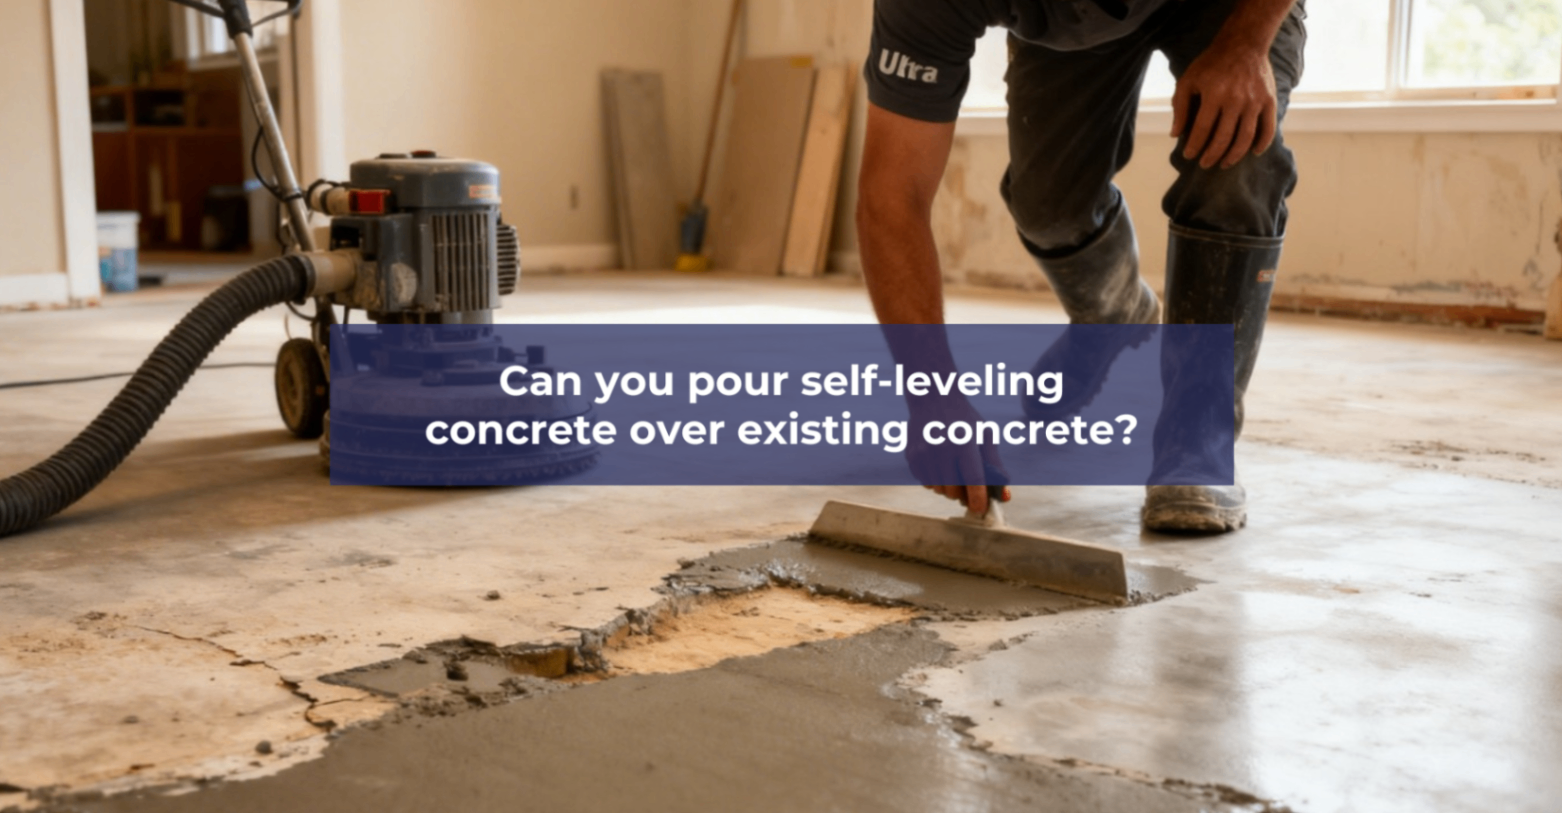
Self-leveling concrete is a specialized polymer-modified concrete mix designed to flow easily and create a smooth, level surface with minimal effort. Unlike a traditional concrete mix, it has a more liquid consistency when mixed with water, allowing it to spread out and fill in low spots on its own. You can pour it directly over an existing floor, but only after proper preparation.
The magic behind this material lies in its chemical composition. The wet concrete mix contains polymers that enhance its flowability and adhesion. When poured, gravity helps the mixture settle into a flat, uniform layer. This process corrects imperfections in the underlying slab.
For the best outcome, it’s crucial to follow the manufacturer’s instructions precisely. Proper mixing, application, and curing are key to achieving a durable and perfectly level surface that is ready for your choice of floor coverings.
Benefits of Using Self-Leveling Concrete Over Existing Concrete Floors
Using a self-leveling compound over an existing concrete floor offers numerous advantages. It is an effective solution for creating a perfectly smooth surface, which is essential for installing modern flooring like tile, laminate, or vinyl. Getting the best results starts with following best practices, such as thorough surface preparation and priming.
This method saves considerable time compared to traditional leveling techniques. It’s also incredibly versatile and provides a strong, durable finish. Key benefits include:
- Fast Installation: The material sets quickly, often allowing for foot traffic within a few hours.
- Smooth Finish: It automatically fills dips and low spots, resulting in a flawless surface.
- Adaptability: It works well on various uneven areas, both indoors and outdoors.
- Compatibility: It creates a suitable base for most types of floor coverings.
Whether you’re a DIY enthusiast or a professional, this method simplifies the process of floor renovation, delivering a high-quality, professional-grade finish with ease.
Common Situations Where Self-Leveling Concrete Is Recommended
Self-leveling concrete is a versatile solution for a wide range of applications where uneven surfaces are a problem. It’s commonly used in both residential and commercial settings to correct uneven floors before installing final flooring. Whether you’re dealing with a new construction project or a renovation, this material can be a lifesaver.
Yes, you can absolutely use it to fix an uneven basement floor, which is one of its most popular applications. Other common scenarios where self-leveling concrete is highly recommended include:
- Leveling uneven floors in garages or basements to prepare for new flooring or coatings.
- Smoothing out a rough or damaged outdoor concrete patio to create a more usable space.
- Correcting settlement issues in older buildings before a renovation.
- Creating a flat surface in commercial spaces to meet safety and aesthetic standards.
Its ability to fix uneven concrete quickly and efficiently makes it an ideal choice for projects that require a fast turnaround without compromising on quality.
Assessing the Condition of Your Existing Concrete Floor
Before you even think about mixing your self-leveling compound, it’s vital to assess the condition of your existing concrete floor. The success of your project hinges on the stability and cleanliness of the base. Ignoring this step can lead to a host of problems down the line.
Any surface damage, significant cracks, or deep pockets of uneven concrete can compromise the adhesion and longevity of the new layer. In the following sections, we’ll discuss how to identify these issues and determine if your concrete surface is a suitable candidate for an overlay.
Identifying Surface Damage, Cracks, and Unevenness
A thorough inspection of your concrete floor is the first step in surface preparation. You need to carefully look for any signs of surface damage, such as cracks, chips, spalling, or significant unevenness. These imperfections must be addressed before you can apply a self-leveling compound.
Identifying these issues early allows you to take corrective action. Small cracks can often be filled with a concrete repair product, but larger, structural cracks might indicate a more serious problem with the foundation.
- For minor cracks and holes, use a quality patching compound and allow it to cure completely.
- If you find large, deep, or shifting cracks, it’s best to call a professional to assess the structural integrity of your concrete floor.
- Use a long, straight edge or a level to identify high and low spots contributing to the unevenness.
Addressing these problems ensures that your new surface will be smooth, durable, and long-lasting, giving you the best possible results.
Determining Suitability for a Self-Leveling Concrete Overlay
Once you’ve identified any damage, you must determine if the existing concrete surface provides a suitable, stable base for the new concrete layer. A common reason self-leveling concrete fails is being applied to an unstable or improperly prepared substrate. The old concrete must be structurally sound.
You should also check for moisture issues. A simple test involves taping a plastic sheet to the floor for 24 hours; if condensation forms underneath, you have a moisture problem that needs to be addressed. The surface must also be porous enough to allow for proper adhesion. If the concrete is sealed or polished, it will need to be ground or shot-blasted to create a rougher profile.
Ignoring these critical checks is a significant risk. Applying an overlay on an unsuitable surface can lead to peeling, cracking, or complete failure of the new layer, wasting both time and money.
Preparing Your Concrete Surface in Queensland’s Climate
Queensland’s unique climate, with its humidity and frequent temperature changes, adds another layer of consideration to your preparation process. These environmental factors can affect how the self-leveling compound cures and bonds to the concrete surface, especially with outdoor concrete slabs.
Proper preparation is not just recommended; it’s essential for a durable, long-lasting finish in this environment. The following steps will cover the crucial techniques for cleaning, profiling, and priming your surface to combat these climate challenges and ensure a successful pour.
Cleaning and Profiling Techniques for Best Bonding
Achieving the best bonding between the new and old concrete starts with meticulous cleaning and profiling. The existing concrete surface must be completely free of dust, dirt, grease, oil, paint, or any other contaminants that could interfere with adhesion. A thorough sweep and vacuum are just the beginning.
After cleaning, the surface needs to be profiled. This means creating a slightly rough texture to give the self-leveling compound something to grip onto. This can be done through mechanical methods like grinding or shot-blasting. The goal is to open up the pores of the concrete.
- Cleaning: Use a degreaser for oily spots and a pressure washer for a deep clean. Ensure the surface is completely dry before proceeding.
- Grinding: A concrete grinder with a diamond-impregnated disc is highly effective for creating the right surface profile.
- Shot-blasting: This method is faster for larger areas and creates an ideal texture for bonding.
- Safety: Always wear appropriate personal protective equipment (PPE), including a dust mask, safety glasses, and gloves.
These steps are non-negotiable for ensuring a strong, permanent bond.
Importance of Primers and Bonding Agents
Yes, a primer is almost always necessary before applying self-leveling concrete. Primers and bonding agents play a critical role in ensuring proper adhesion between the new layer and the old concrete slab. They seal the porous concrete surface, preventing air bubbles from rising and creating pinholes in your new floor. They also stop the substrate from absorbing water from the self-leveling mix too quickly, which can cause it to cure improperly and crack.
In Queensland’s humid conditions, using the right primer is even more important. It acts as a barrier against moisture that could compromise the bond over time. The primer essentially creates an ideal surface for the self-leveling compound to stick to, promoting a stronger, more durable connection.
Make sure to choose a primer that is compatible with your specific self-leveling product. Applying the primer evenly with a roller or brush and allowing it to dry according to the manufacturer’s instructions is a crucial step for a successful, long-lasting finish.
How to Properly Pour Self-Leveling Concrete Over Old Concrete
Now that your surface is prepared, it’s time for the main event: the proper pouring of your self-leveling concrete. This stage is where your preparation pays off, allowing you to create a flawless, level surface. The process isn’t complicated, but it does require you to work efficiently and methodically.
To achieve a professional-looking new layer, it’s crucial to have all your tools ready and to follow the manufacturer’s instructions for mixing and application to the letter. Let’s walk through the tools you’ll need and the step-by-step process for a successful concrete leveling project.
Tools and Materials Checklist for a Successful Pour
A successful pour begins with having all the right tools and materials on hand. Being prepared prevents you from having to stop mid-process, which can ruin the finish of your self-leveling concrete mix. Skipping key items like a gauge rake or spiked roller can result in an uneven surface and trapped air bubbles.
Here is a checklist of essential tools and materials. Having these items ready will help you follow the best practices for installation and ensure a smooth workflow from start to finish.
|
Tool/Material |
Purpose |
|---|---|
|
Self-Leveling Concrete Mix |
The main product for creating the new level surface. |
|
Large Mixing Bucket(s) |
For mixing the compound to the right consistency. |
|
Drill with Mixing Paddle |
Ensures a smooth, lump-free mix without introducing too much air. |
|
Primer/Bonding Agent |
To seal the substrate and enhance adhesion. |
|
Gauge Rake |
Spreads the material to a consistent, predetermined thickness. |
|
Spiked Roller |
Removes trapped air bubbles from the poured compound. |
|
Spiked Shoes |
Allows you to walk on the wet surface to use the spiked roller. |
|
Finishing Trowel |
For smoothing edges and hard-to-reach areas. |
Step-by-Step Process, Mixing, and Application Tips
Following a clear step-by-step process is key to a professional finish. After priming the surface, the mixing and application phase begins. A critical tip is to mix only what you can pour and spread within about 20 minutes, as the material starts to set quickly. Always add the pre-measured water to the bucket first, then add the dry powder to prevent clumps.
During application, pour the mixture in strips across the floor, starting at the corner furthest from the exit. Let the compound flow and find its level, but don’t rely on it to do all the work.
- Use a gauge rake to help guide the material into corners and ensure a uniform thickness across the entire area.
- Immediately after spreading, use a spiked roller to go over the wet surface to release any trapped air bubbles.
- Work quickly and methodically, maintaining a “wet edge” to ensure each new pour blends seamlessly with the last.
Finally, respect the recommended drying time before allowing foot traffic.
Potential Challenges and Mistakes to Avoid
While self-leveling concrete is a fantastic product, it’s not entirely foolproof. There are several potential challenges and common mistakes that can lead to a less-than-perfect result. From potential cracking to uneven areas, being aware of these pitfalls is the first step to avoiding them.
Understanding why these problems occur, such as through improper mixing or poor surface prep, can save you from a costly and frustrating repair job. In the next sections, we’ll explore the common reasons for failure and how to manage specific environmental challenges in Brisbane to ensure your project is a success.
Common Reasons Why Self-Leveling Concrete Fails
The most common reason self-leveling concrete fails is poor preparation. If the substrate isn’t clean, sound, and properly primed, the new layer simply won’t bond correctly and may peel or delaminate over time. Hidden moisture in the existing slab is another major culprit, as it can prevent proper curing and weaken the bond.
Another frequent mistake is applying the product outside of its recommended thickness. Most self-leveling compounds are designed for thin pours. Making thick pours in a single layer can lead to shrinkage, cracking, and a weak final product.
- Poor Preparation: The surface was not cleaned, profiled, or primed correctly.
- Excess Moisture: High moisture content in the underlying slab was not addressed.
- Incorrect Mixing: The water-to-powder ratio was wrong, or the mix was not blended thoroughly.
By being mindful of these issues in advance, you can drastically increase your chances of a successful and durable finish.
Managing Moisture and Curing Time in Brisbane Conditions
Yes, moisture is a significant concern, and Brisbane’s high humidity and temperature can greatly influence the drying time and overall success of your project. High humidity in the air can slow down the evaporation of water from the mix, extending the time it takes for the concrete to cure. This can leave the surface vulnerable to damage for longer.
To manage these environmental conditions, try to plan your pour on a day with lower humidity if possible. Ensure good air circulation in the area, but avoid creating strong drafts that could cause the surface to dry too quickly and crack. It’s crucial to monitor the surface as the concrete cures.
Improper curing can severely impact the durability and strength of the final surface. Always follow the manufacturer’s guidelines regarding temperature and humidity ranges for application. Rushing the process or ignoring the local climate can lead to a weak, cracked, or uneven floor.
Conclusion
In conclusion, pouring self-leveling concrete over existing concrete can be an effective solution to achieve smooth, even flooring. Understanding the process, preparing the surface properly, and being aware of potential challenges are crucial steps to ensure a successful outcome. By following the guidelines outlined in this blog, you can enhance the durability and appearance of your floors, making them more functional and aesthetically pleasing. Whether you’re tackling a DIY project or hiring a professional, the right knowledge empowers you to make informed decisions. If you have further questions or need assistance, feel free to reach out for expert advice on your concrete projects!
Frequently Asked Questions
How thick can you pour self-leveling concrete over an existing floor?
Most self-leveling concrete products can be poured from a feather edge up to 1 inch thick in a single application. For thicker applications, it’s best to build up the new layer in stages, allowing each to cure. Some specialized products allow for thicker pours, so always check the manufacturer’s specifications.
Can self-leveling concrete be used to fix an uneven basement or garage floor?
Absolutely. Self-leveling concrete is an effective solution for creating a level surface on an uneven basement or garage floor. It’s one of the most common applications for the product, providing a smooth, durable foundation for floor coatings, tiles, or other coverings.
Do I always need to use a primer before applying self-leveling concrete?
Yes, using a primer is a critical step in surface preparation that should not be skipped. A primer seals the old concrete, prevents air bubbles, and ensures proper adhesion between the existing surface and the new layer of self-leveling concrete. It is essential for a long-lasting, professional result.